FIX YOUR SHUTTER.
NOT YOUR BRICK.
Watch the video first. Then follow these simple steps to secure a lightweight decorative vinyl shutter using the existing fastener location, where possible.
▶ Watch the videoWatch the installation.
See the ShutterRX repair method before you start. You can pause or replay the video while you work.
Tip: Use Wi-Fi for the smoothest playback. The video is hosted directly with this site.
How to use ShutterRX
For a broken plastic fastener that remains lodged in a sound brick mounting hole:
Check the shutter and wall
Identify the loose fastener location. Make sure the shutter is intact and the brick isn't cracked or crumbling. Don't work on an unstable ladder.
Position the spacer
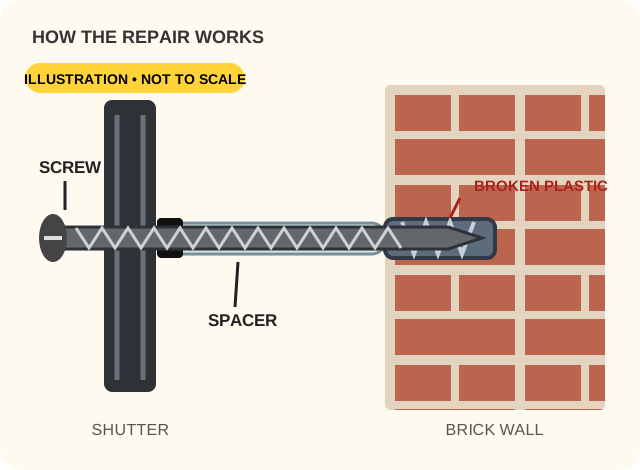
Place the supplied spacer behind the shutter at the fastening point to maintain the gap between shutter and brick. Trim to fit if needed.
Drive the screw
Align the screw through the shutter hole and into the remaining plastic fastener. Drive slowly and stop when the shutter is snug; don't overtighten or crush the vinyl.
Check the hold
Gently check that the shutter is secure. Repeat at the other mounting points as needed.
Use an appropriately rated masonry anchor only if the existing hole and wall material are suitable. Follow the anchor manufacturer's drilling and installation instructions. Do not rely on a loose screw or unsuitable anchor.
Important: ShutterRX is intended for lightweight decorative vinyl shutters, not structural shutters or storm protection. Wear eye protection when drilling. If working at height or if masonry is damaged, use a qualified installer.
See the repair up close.
The screw uses the existing broken plastic fastener to help secure the shutter. No digging out the plastic when it can be safely reused.
Replay the video ↑